Supported file types
- Documents: All supported document types
- Presentations: Presentations
- Text-based: .csv, .txt
Basic outline of sending a signature request
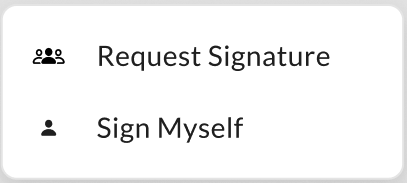
- Preview Mode: Open the document, click the Box Sign icon in the right-side application bar, and select one of the options from the drop-down list. Options are Request Signature and Sign Myself.
- Files: Hover on the document, then click the ellipsis button (”…”) and select Sign. Select one of the options - Request Signature or Sign Myself.
- For multiple files - select the documents and click the ellipsis button (”…”) in the top right corner of your screen. Select Sign and choose one of the options: Request Signature or Sign Myself.
- Home Window: Click the Box Sign icon in the left sidebar. The instructions in the following sections follow this route.
- Assign each recipient a role.
- Choose whether to apply an additional recipient authentication control.
- Specify the order of signature for each recipient.
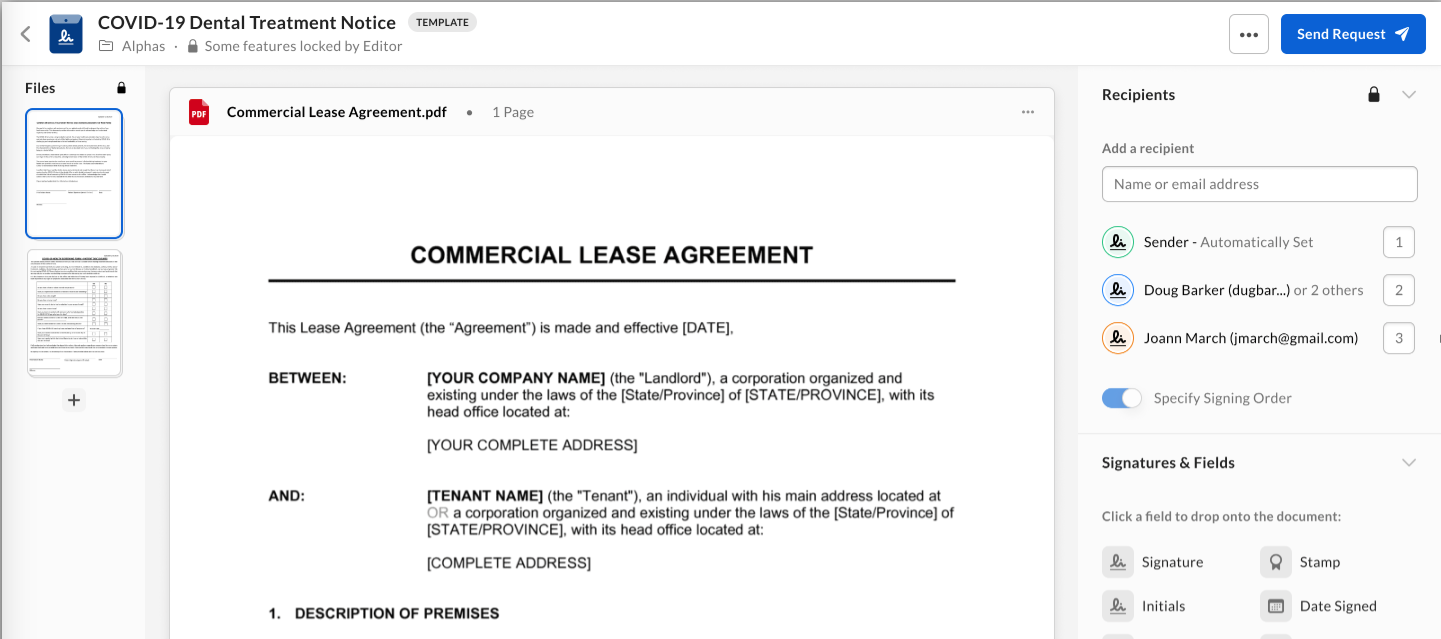
Sending a signature request
Step 1: Uploading a document for signature
- From the Files page, select Sign from the left-hand pane.
- Click Request Signature from the top right corner to start a signature request or select additional options from the drop-down menu:
- Request Signature (Several Signers including yourself): Select this option for signature requests that require multiple recipients, including yourself if needed.
- Sign Myself (Only you): Select this option for individual signing or approval.
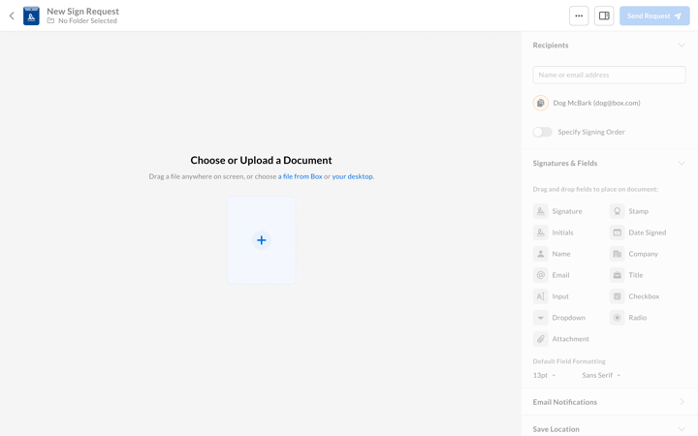
- On the New Sign Request screen, add a file to submit by:
- clicking the + button and selecting either Choose from Box or Upload File.
- clicking the choose a file from Box or your desktop links.
- dragging and dropping files onto the screen.
- Select a file.
Steps 2 and 3: Adding and modifying a recipient
Define who receives the request for signature.From Sign home page
- Under Request Signature, select one of the following:
- Sign Myself (only you): You are the only signer of the request. The following items are displayed for the signer to complete:
- Signature
- Stamp
- Initials
- Date signed
- Name
- Company
- Title
- Text input
- Checkbox fields
- Sign Myself (only you): You are the only signer of the request. The following items are displayed for the signer to complete:
- Request Signature (several signers including yourself): The request requires one or more other people to sign. After you upload the document(s), Box Sign displays a preview of the document(s), enabling senders to:
- Add or remove additional files.
- Replace, rename, or delete files.
- Add or modify recipients and recipient groups, including recipient roles and authentication
- Drag and drop fields.
- Determine save location once the request is completed.
- Modify email notifications, including automatic reminders.
- Set a customized expiration date and adjust file name.
- Click Send Request when the request is ready to be sent to the designated signers in the order specified, or click Sign & Finish if the Sign Myself option was selected.
Note: The Request Signature option offers senders all of the same fields as a Sign Myself request, but also includes radio buttons, dropdown menus, and signer attachment fields.
From Files folder
- Hover over the file and click the checkbox, and then repeat for the following files you want to send for signature.
- Click the ellipsis button (”…”) in the top right corner of your screen.
- Choose
 Sign from the drop-down list.
 - Select one of the options - Request Signature or Sign Myself.
- Add your recipients in the New Sign Request screen.
From Preview
- Select the document and, from the right-side application bar, select the Box Sign icon.
- Select Request Signature or Sign Myself.
- Under Where should the request be saved? select the location where you want to save the request in Box.
- Click Continue.
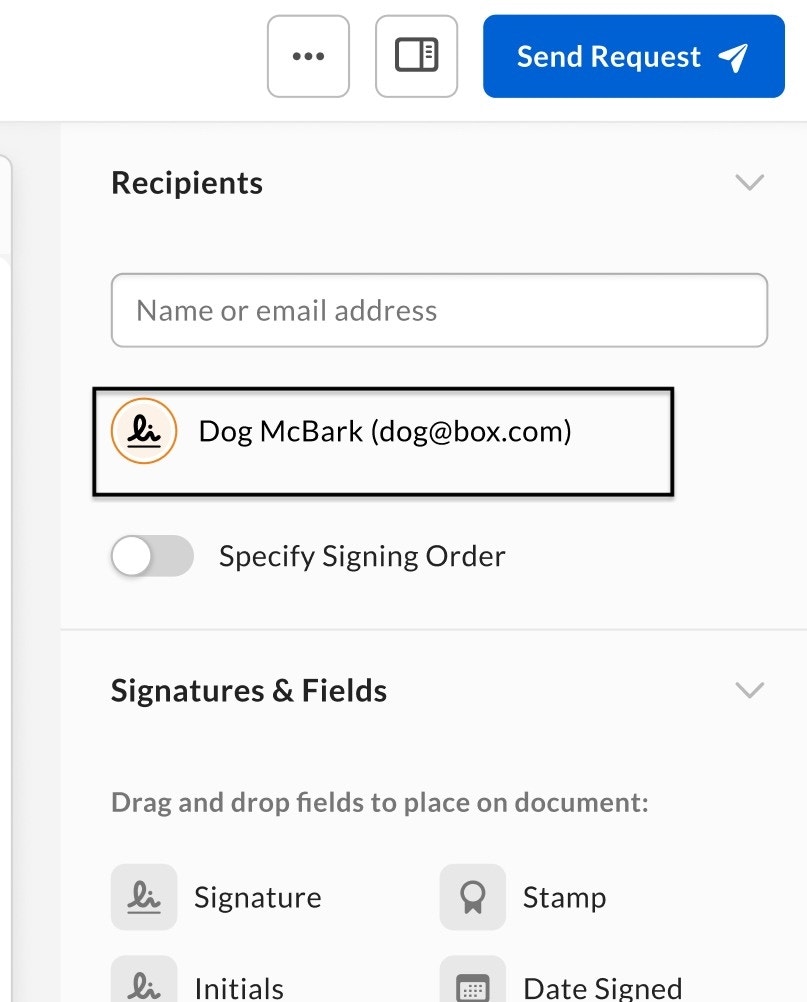
- In the document preview window, click a recipient’s email address. In the right sidebar, Box Sign displays the Modify Recipient panel.
- Under Role, assign a role to the recipient. Choose one of the following:
- Signer to request a signature from the recipient.
- Get a Copy to send the recipient a copy of the finalized request after everyone has signed.
- Approver to request approval of the file but not a signature.
- In-Person to require the recipient to sign on your device. This process does not include steps for recipient authentication, and the signing log indicates “not verified by Box Sign”. Immediately after document preparation is done, Box Sign prompts in-person signers to sign, regardless of the selected signing sequence.
- Apply Additional Recipient Authentication:
- Optionally select one authentication method from the dropdown:
- Box Login (Available only on Enterprise Plus and Enterprise Advanced accounts)
- SMS Authentication
- And/Or Require Password (Optional)
- Optionally select one authentication method from the dropdown:
- Click the left arrow at the top of the page.
- To enforce a signing order, under Recipients, click the Specify Signing Order slider button.
- In the right-hand sidebar beside each recipient’s email address, Box Sign displays a number indicating the order in which the recipient receives the document for signature. To alter this order, click the number and change it.
- Select Send Request once you have fully prepared your file for signing.
- If you need to remove a recipient, select the recipient’s email and click Remove Recipient.
Assigning Different Roles to the Same Signer
You can add a recipient multiple times to the same document if you need to assign different roles to that recipient or if you need the same recipient before and after another signer. However, you need to toggle Specify Signing Order and assign the recipient to a different number than their first assigned number. For example, if the recipient is first added as second in the list, then their number is 2 and must be a different number when adding them again to the list.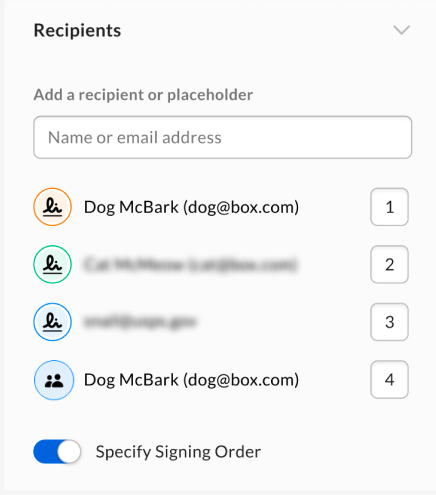
Adding a recipient group
As a signature request sender, you can use the recipient group feature to add single recipients and create a group out of them. Only the first person from the recipient group to take action will be able to sign or approve the document.Note: Adding a recipient group in Box Sign is available to all customers on Enterprise, Enterprise Plus, and Enterprise Advanced plans.
- you know of multiple authorized signers within one organization,
- some signers/approvers of the document are absent or unavailable.
- Add your first recipient in the Add Recipients field on the signature request creation page.
- Select the checkbox Add as a recipient group.
- Add also individual recipients in the Recipients field if needed.
- Assign the correct role to the recipient group. Available options are:
- Signer,
- Get a Copy,
- Approver.
Note:
- You can add recipient groups to Box Sign templates. For more information, see Creating, using, and sharing templates.
- For recipients classified as “Get a Copy”, this role setting automatically saves a copy of the completed signature requests to the “My Signed Documents” folders for those recipients. However, the admin can change this setting to ensure that such recipients only receive a link to the completed signed documents. See Enabling Recipient Controls for more information.
Restrictions
Number of recipients in a group: You can add a maximum of 35 unique email addresses to the signature request. Each individual in a recipient group counts towards this total. When you try to add more than 35 recipients to the group, the following error message appears: Failed to add user because it exceeds the maximum 35 unique users per signature request. Adding the same recipient multiple times: You can add the same recipient more than once (for example once in a recipient group and once as a required individual signer), but the signing order needs to be different. See the possible error message below: Sending the request: Failed to send because user dog@box.com has been added multiple times with the same signing order. To proceed, recipients need to have a different signing order to be used multiple times in the same request.Step 4: Preparing the request
To prepare the signature request, you can add signature fields, text fields, dates, checkboxes, groups of radio buttons, and dropdown menus to the request, as well as provide instructions and select to send automated reminders. A group of radio buttons enables the recipient to select one button from the group, and each group must contain at least two radio buttons. Dropdown menus enable recipients to select one option from a list of at least two options.Important:Box’s public APIs and Box Sign’s template tags do not support radio buttons and drop down menus.
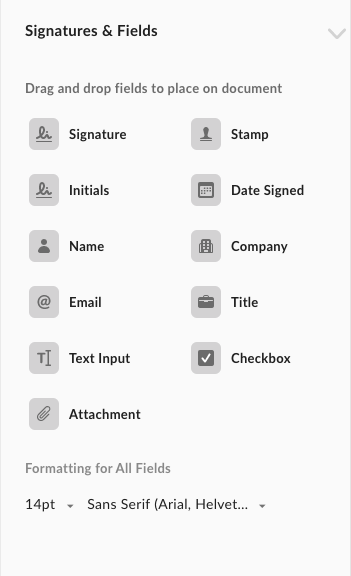
- In the right sidebar, under Signatures & Fields, click a field you want to include in the signature request. You can include a field for any of the following:
- Signature
- Date Signed
- Text Input (custom text entry)
- Checkbox
- Name
- Company
- Title
- Initials
- Stamp
- Attachments
- Groups of radio buttons
- Dropdown menus
Note: If your admin has restricted certain field types for your account or group, those fields won’t appear in the Signatures & Fields list. For more information about field restrictions, see Enabling Sender Controls.
- Hold down the mouse button and drag the field onto the document. Hover over the area where you want to add the field, and release the mouse button.
- After adding the field, right click to open the shortcut menu:
- Cut
- Copy
- Duplicate
- Delete
- After adding the field, right click to open the shortcut menu:
- To select multiple fields, left click on your mouse and hover over the fields you want to modify. After selecting the fields, you can drag and drop the fields in your document.
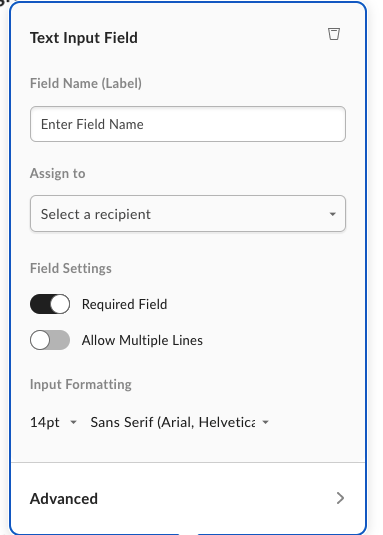
- Click the newly added field. Box Sign displays a configuration window. Click the options you want to apply to the field.
- To define a date, checkbox, text field, radio button, or dropdown menu as required information to be provided by the recipient, click the field then click Required Field. By default, Box defines signature fields as required.
- To set the current date into a date field, click the date field, then click Advanced Options > Prefill Date.
- To make a text field span multiple lines, click the text field, then click Advanced Options > Multiline.
- To add an external ID, click the field, then click Advanced Options > External Identifier. Use the external ID to pre-fill data from another application. Also use an external ID to export into an Excel file the data that users filled-in during signing. Add an ID to the fields by adding “id:examplename”. For example, to add an ID to a text field, use [[t|1|id:examplename]].
- Adjust the position of the field by clicking in the middle of the field and dragging it. Adjust the size of the field by clicking the bottom-right corner of the field and dragging.
Pre-filled Text
To prepopulate a field with text, you can add the text in the “Pre-filled Text“ area of the field’s option menu. If text is pre-filled in a field, signers can see and edit the text if needed.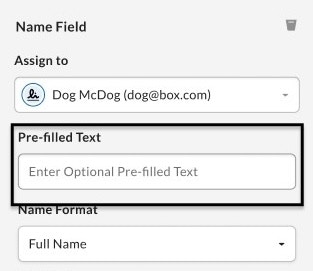
- Name Field
- Company
- Title
- Text Input
Read-Only
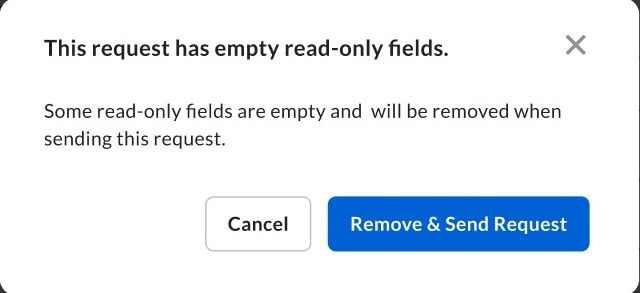
To lock a field’s value and prevent changes by signers, enable Read-Only under the field settings in the field’s option menu.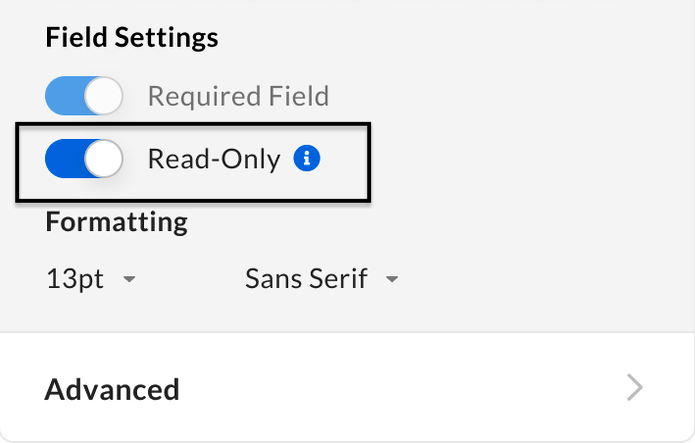
- Name Field
- Text Input
- Company
- Title
- Checkbox
- Radio Button
- Drop-down


- Senders can change the font size and font style across all text based fields on the document using the Input Formatting section in the sidebar.
- Senders can also make font size and font style changes for individual text based fields in the edit popover. Changes here only apply for that specific field.
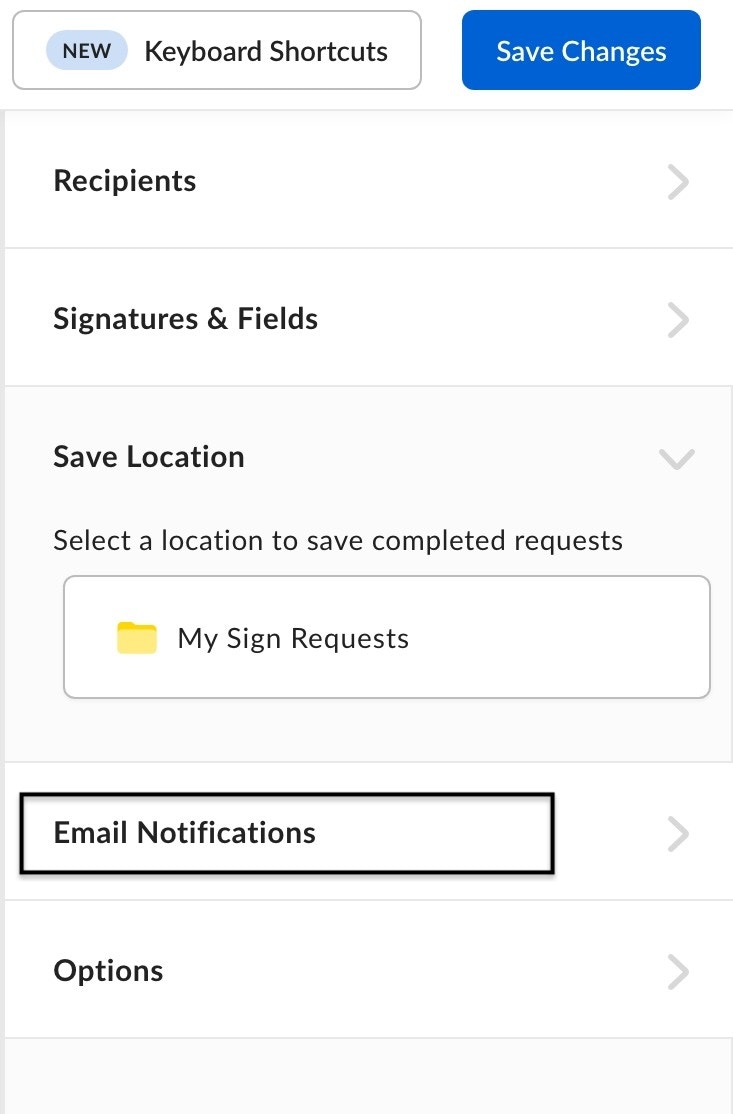
- In the right sidebar, under Email Notifications:
- In Subject, type a description of the request.
- In Message, type instructions or other information for the recipient.
- To send automatic reminders, click Send automatic reminders. Box Sign will send reminders 3, 6, 11, and 16 days after sending the signature request.
- Now set an optional expiration.
Step 5: Setting an expiration
When you prepare a signature request, you may choose to include an expiration for the request. When you set an expiration date, the request expires at midnight, GMT, on the date you select.
- In the right sidebar, click Options.
- Toggle the Set Expiration button.
- Under Days to expiration, type the number of days to specify when the signature request expires.
- Example: If you enter “1” for the days, the request expires 24 hours after the being sent; 01/Jan/2025 19:00 (GMT), the request then expires at 2/Jan/2025 19:00 (GMT).
Note: You will need to manually notify the recipients of the expiration date.
Step 6: Sending a request for signature
To send a request for signature:- In the top-right corner of the document preview window, click Send Request.
Sending manual reminders
After you send a signature request, Box Sign also enables you to send manual reminders. When you send a manual email reminder, Box Sign immediately again sends the original emailed signature request to all required signers who have not yet signed the document. To send a manual reminder:- In your Sign window, click the title of an unsigned document.
- Click the ellipsis button (”…”).
- Click Send Reminder.
Attaching files to a signature request
To add the attachment field to a signature request:- In the document prep screen, click and drag the attachment field over to where you want it in the document.
- Fill out the file name “label” and description text boxes and then assign the attachment field to your selected recipient.
- Select if you want the field to be required or not.
Note: the attachment size limit for signature requests is 30MB.