Before you begin
To organize a Hub, you must have co-owner or editor permissions. For details, see Box Hubs Permissions.Edit your Hub
To open a Hub in edit mode:- Go to the Hubs gallery.
- Select the Hub you want to edit.
- In the upper-right corner, select Edit.
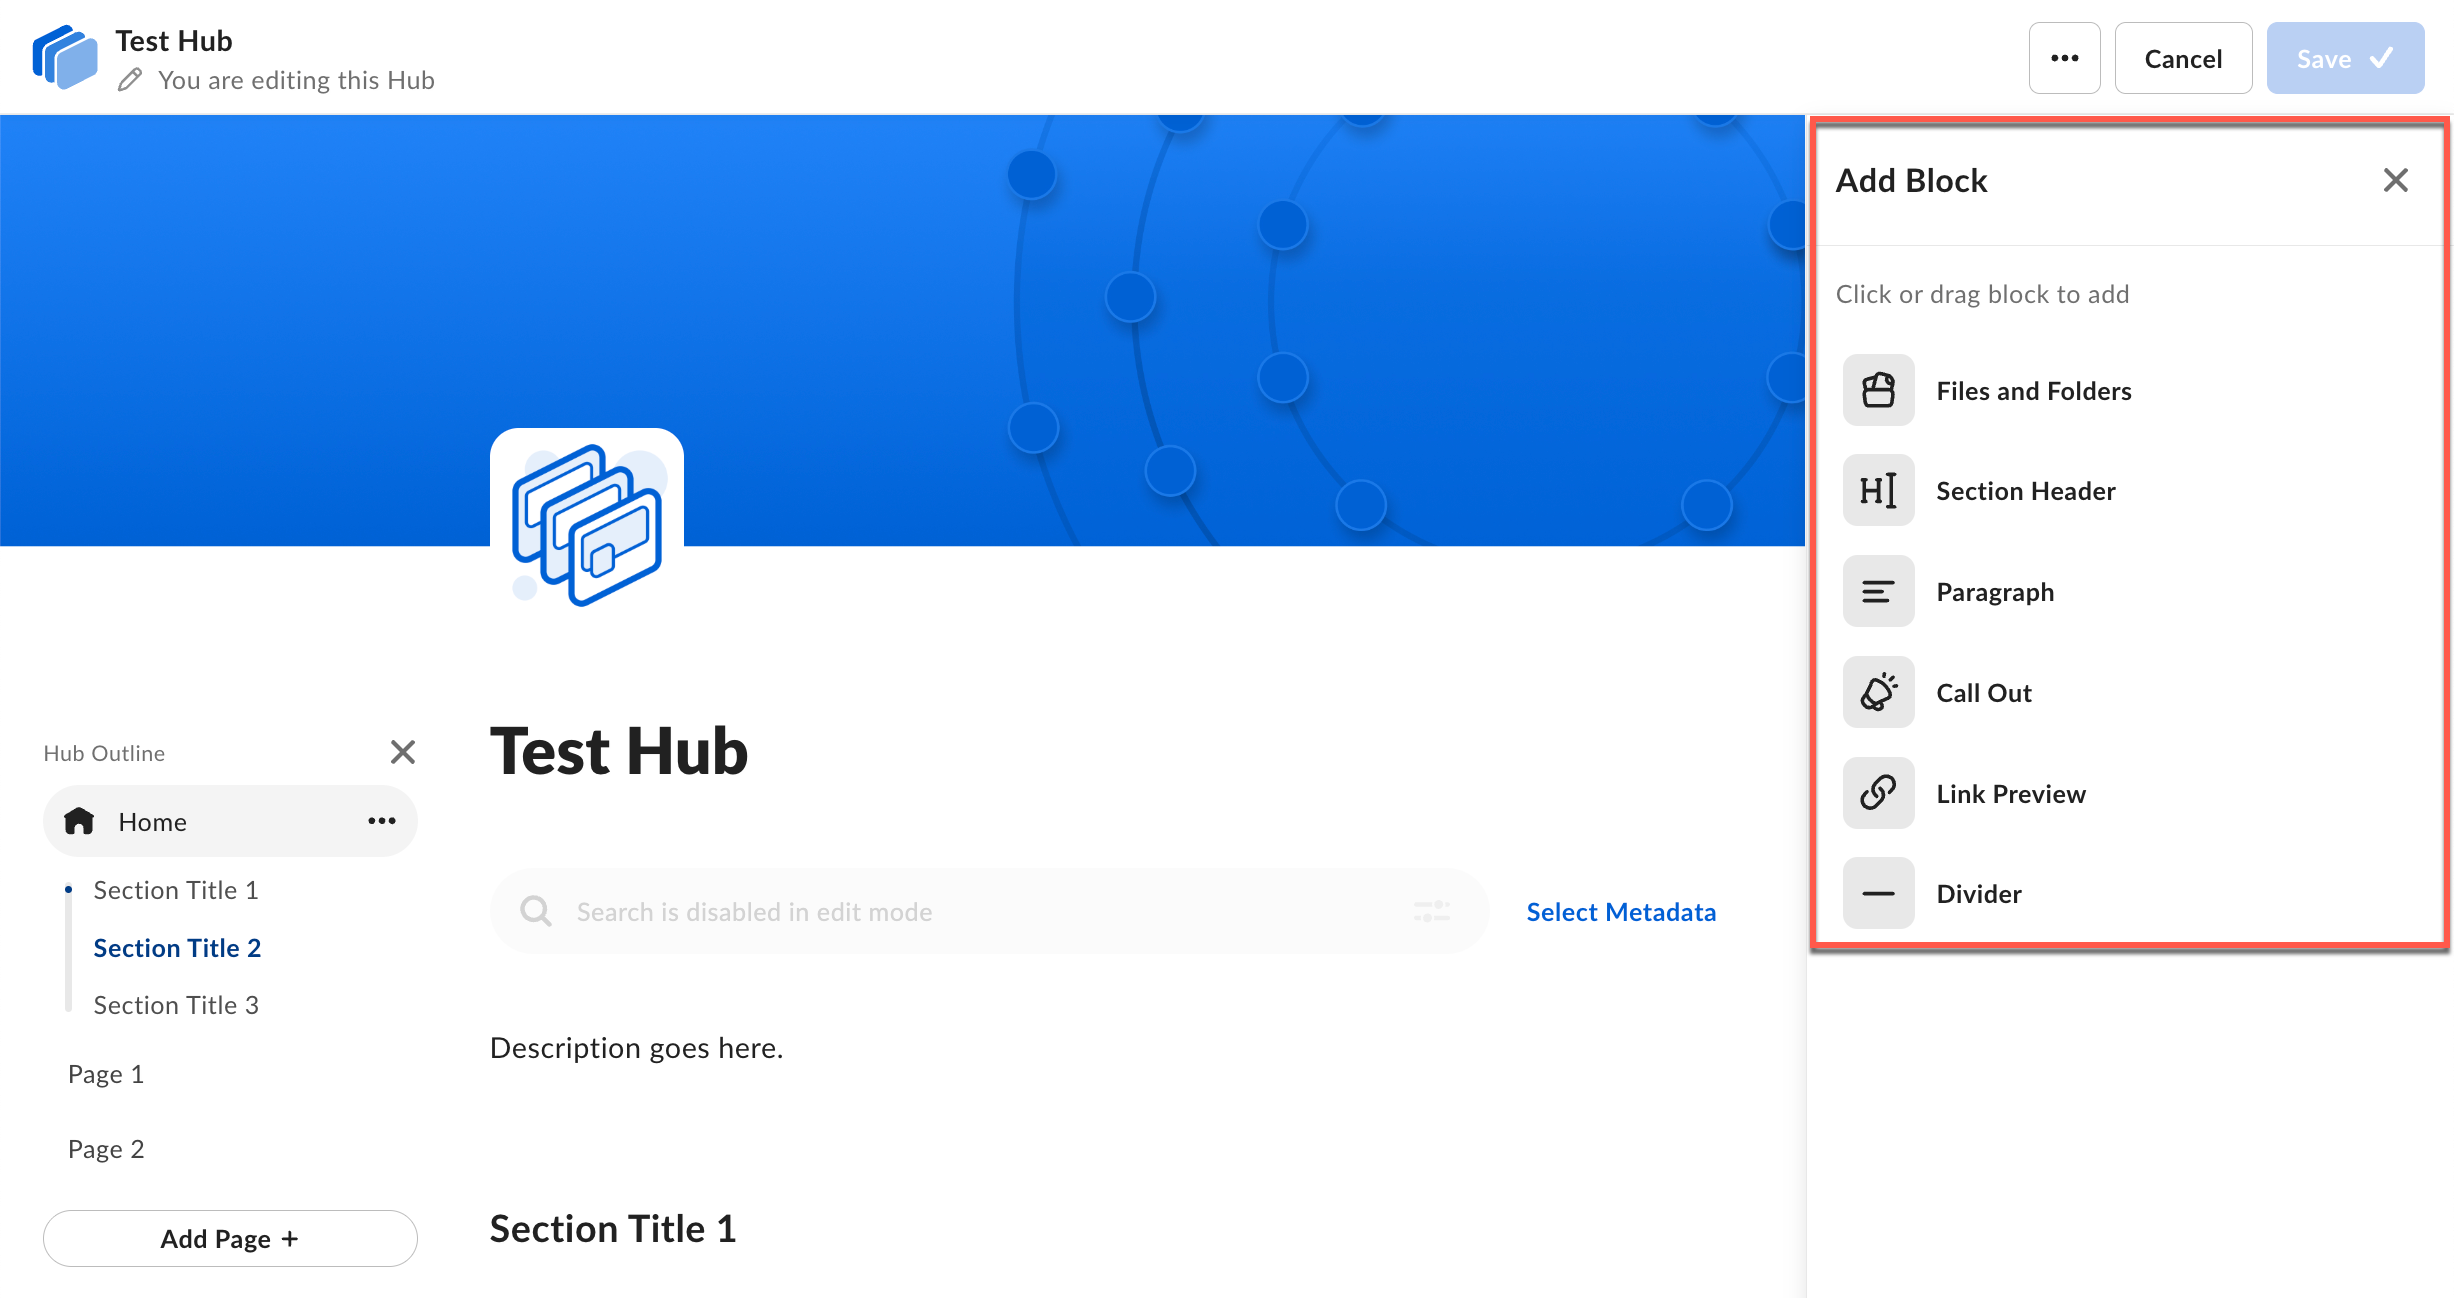
Content blocks
Content blocks are the building blocks of your Hub. Each block type serves a different purpose:| Block type | Description |
|---|---|
| Files and Folders | Add content from your Box account. |
| Section Header | Create an organizational section with a title (up to 100 characters). |
| Paragraph | Add text content (up to 5000 characters). |
| Call Out | Highlight important information in a new call out window (up to 5000 characters). |
| Link Preview | Embed interactive content directly in your Hub. |
| Divider | Add a visual separator between content. |
Add a block
Use either method to add a block: Method 1: Click to add- In the Add Block panel, select the block type.
- The block appears at the end of the page.
- In the Add Block panel, drag the block type onto the page.
- Drop it in the desired location.
Manage blocks
To manage a block:- Select the block on the canvas.
- The context toolbar appears with available options:
- Move up or down
- Move to a Different Page
- Duplicate
- Trash
- Add Items (for Files and Folders blocks)
- Display as grid or list (for Files and Folders blocks)
- Formatting toolbar (for Paragraph and Call Out blocks)
In Files and Folders blocks, individual files become draggable only after you select the block. This prevents accidental movement.
- List view: Drag and drop files or folders to reorder them.
- Grid view: Select a file or folder, click the … (three dots) at the bottom of the card, and click the Move Left or Move Right arrow.
Delete a block
- Select the block.
- On the context toolbar, select Trash.
Sections
Sections help you organize related content by creating visual separators on your page. Each section title marks the beginning of a new section.Create a section
- In the Add Block panel, select Section Title or drag it onto the page.
- Enter a section title (up to 100 characters).
- Add content blocks to your section.
Reorder sections
- Select the section title.
- In the context toolbar, select Move Up or Move Down.
- Move the section to the desired position.
Rename a section
- Select the section title.
- Enter the new title.
Delete a section
- Select the section.
- In the context toolbar, select Trash.
Pages
Pages provide another level of organization in your Hub. You can create multiple pages and nest them to build a clear hierarchy.Add a page
- In the Hub Outline panel, select Add Page (+).
- Replace the default title with your page name.
Add a nested page
Nested pages (subpages) appear under a parent page in the hierarchy.- In the Hub Outline panel, hover over the parent page.
- Select the ellipsis (…) to open the page options.
- Select Add Nested Page.
- Enter a title for the nested page.
Duplicate a page
- In the Hub Outline panel, hover over the page.
- Select the ellipsis (…) to open the page options.
- Select Duplicate Page.
Change page hierarchy
You can reorganize your pages at any time:- Reorder pages: Drag a page up or down to change its position.
- Create nested pages: Drag a page onto another page to make it a subpage.
- Promote nested pages: Drag a subpage into the main page area to make it a top-level page.
Your home page is always the highest page in the hierarchy and can’t be moved.
Delete a page
- In the Hub Outline panel, hover over the page.
- Select the ellipsis (…) to open the page options.
- Select Delete Page.
- In the confirmation dialog, select Delete.
Notify collaborators of changes
After you make changes to your Hub, you can notify all collaborators through email.Send a change notification
- Make your changes to the Hub.
- In the upper-right corner, select Save > Save & Notify Collaborators.
- In the notification dialog, enter a message describing your changes.
- Select Save & Notify.
Save without notifying
If you don’t want to notify collaborators:- Make your changes to the Hub.
- In the upper-right corner, select Save.