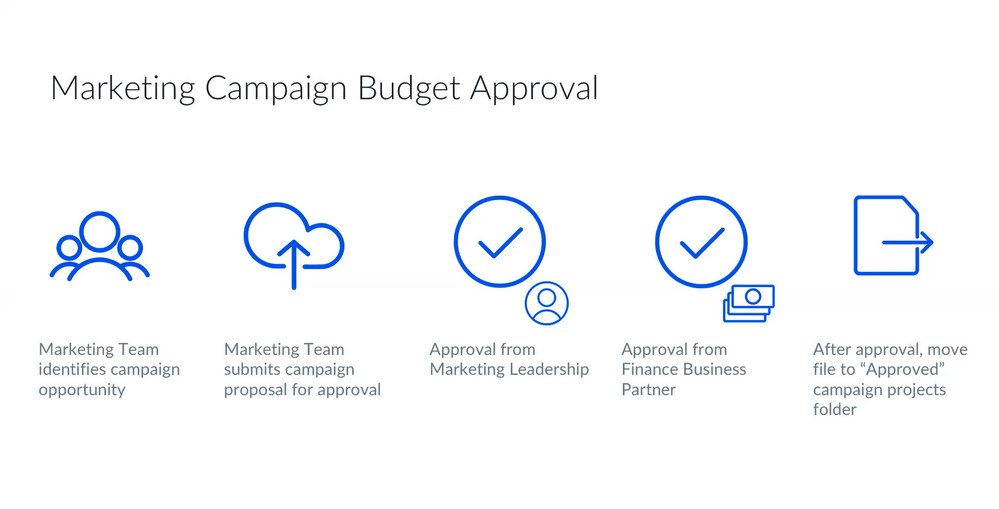
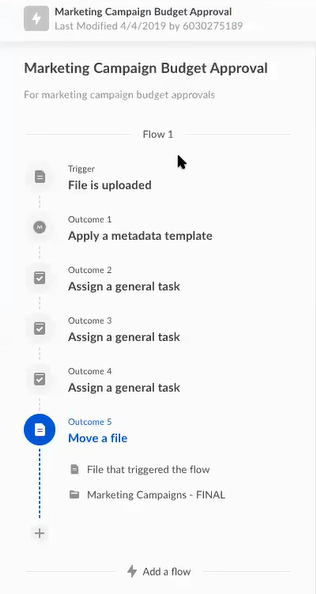
- A team member submits the proposal to marketing leadership for approval.
- Marketing leadership reviews and approves the proposal and sends it to finance for approval.
- Finance reviews and approves the proposal budget.
- The fully-approved proposal moves to an “approved” folder, and the marketing team can begin working on the campaign.
- Open your BoxFiles page. In the lefthand navigation, click Relay to display the Workflows page.
- Click New Workflow. The Workflow Builder page displays.
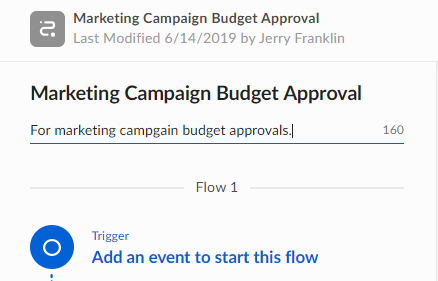
- In the Untitled Workflow box, enter the name of the workflow – in this case, call it Marketing Campaign Budget Approval .
- In the Add a description box, enter text that clearly explains the intent of this workflow.
-
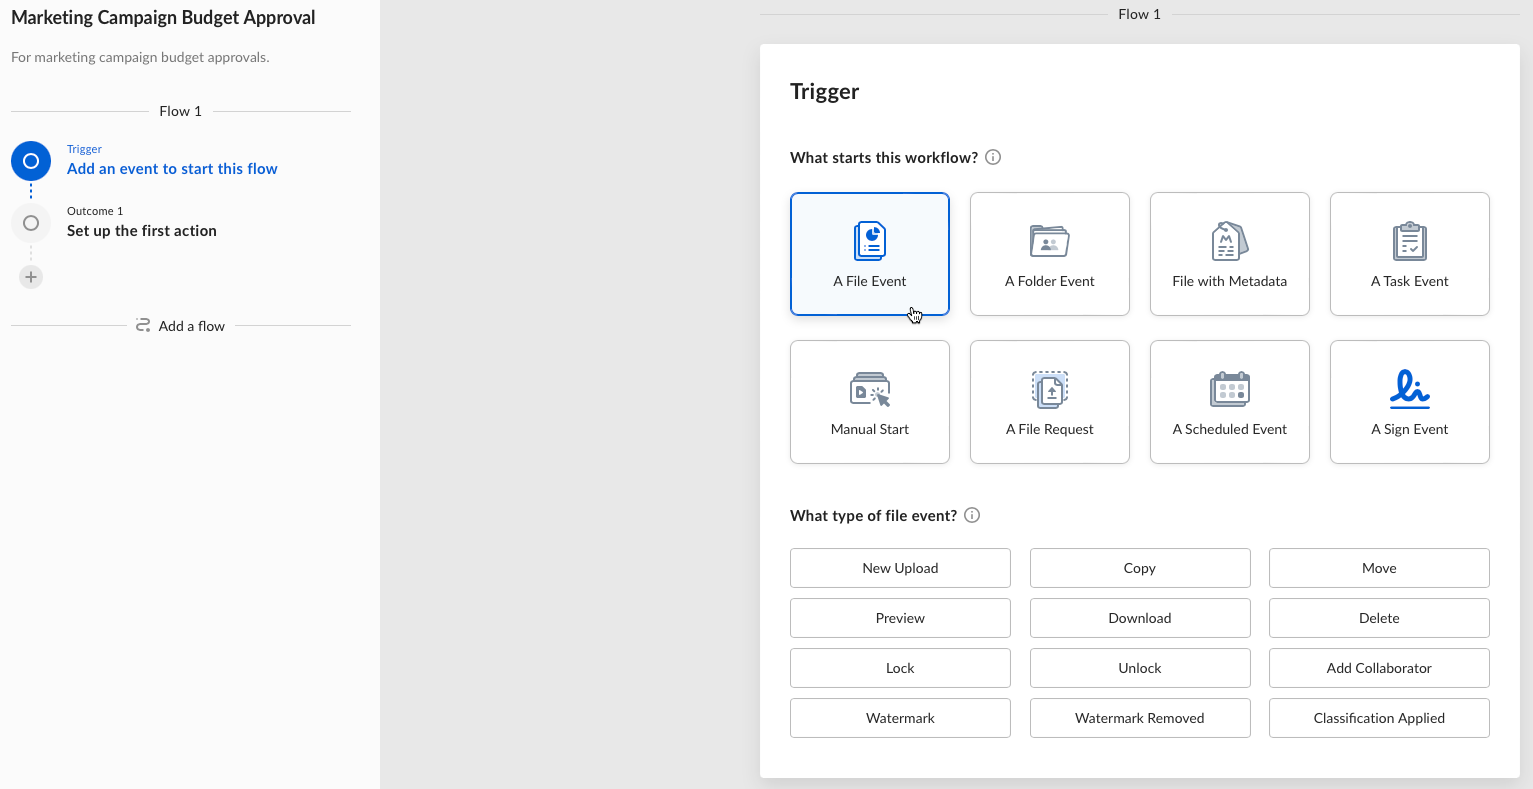
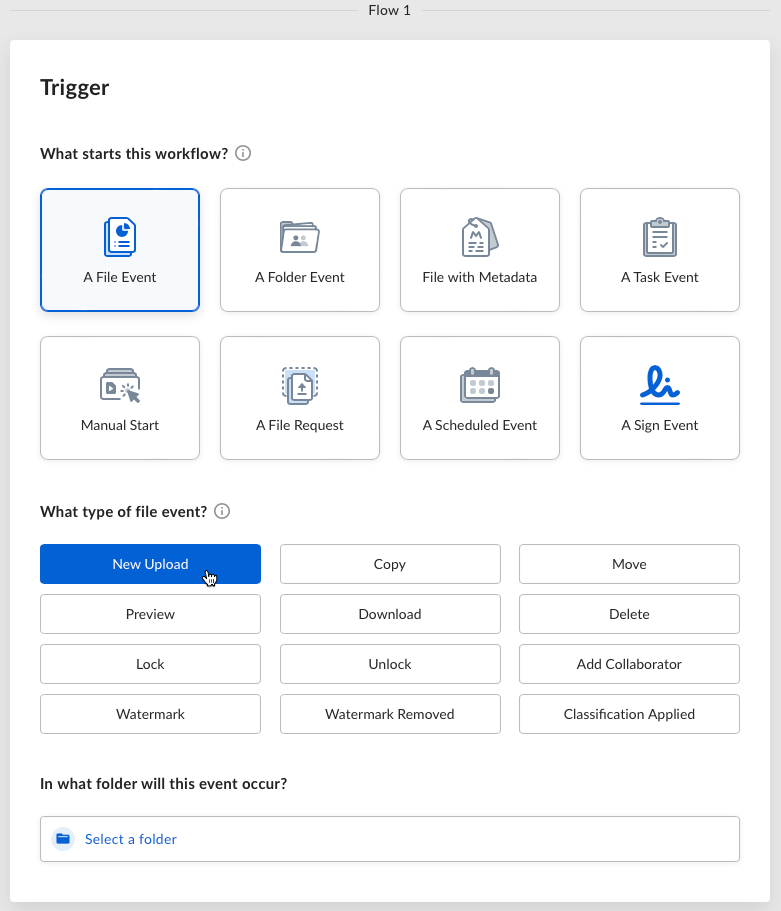
Under What starts this workflow? click A File Event.
-
Under What type of file event? click New Upload.
-
Under In what folder will this event occur? click the box and then click Select a folder from Box. The Select a folder to act on box displays.

-
From the list of folders that displays, select Marketing Campaign Proposals – REVIEW and click Select.

-
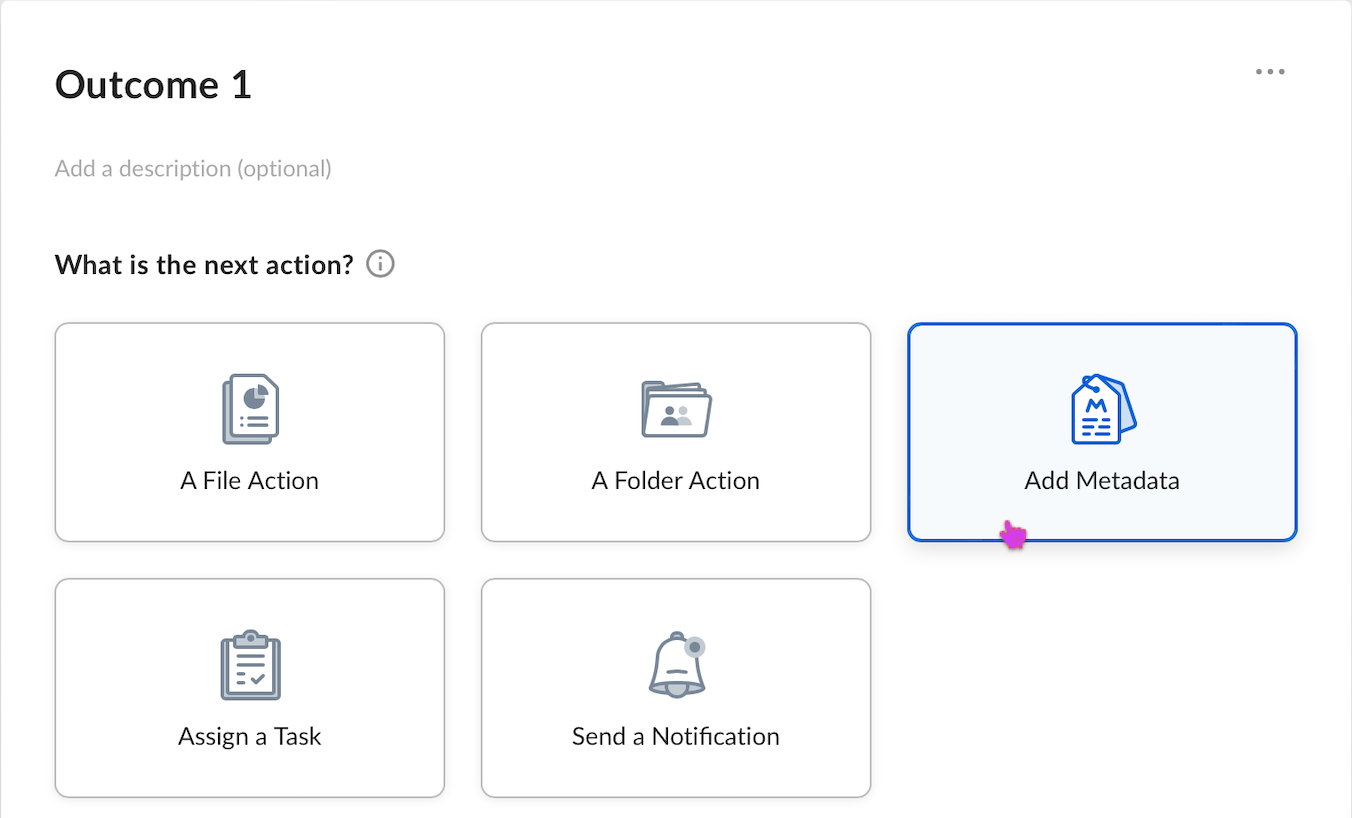
Click Add Metadata in the Outcome 1 box.
-
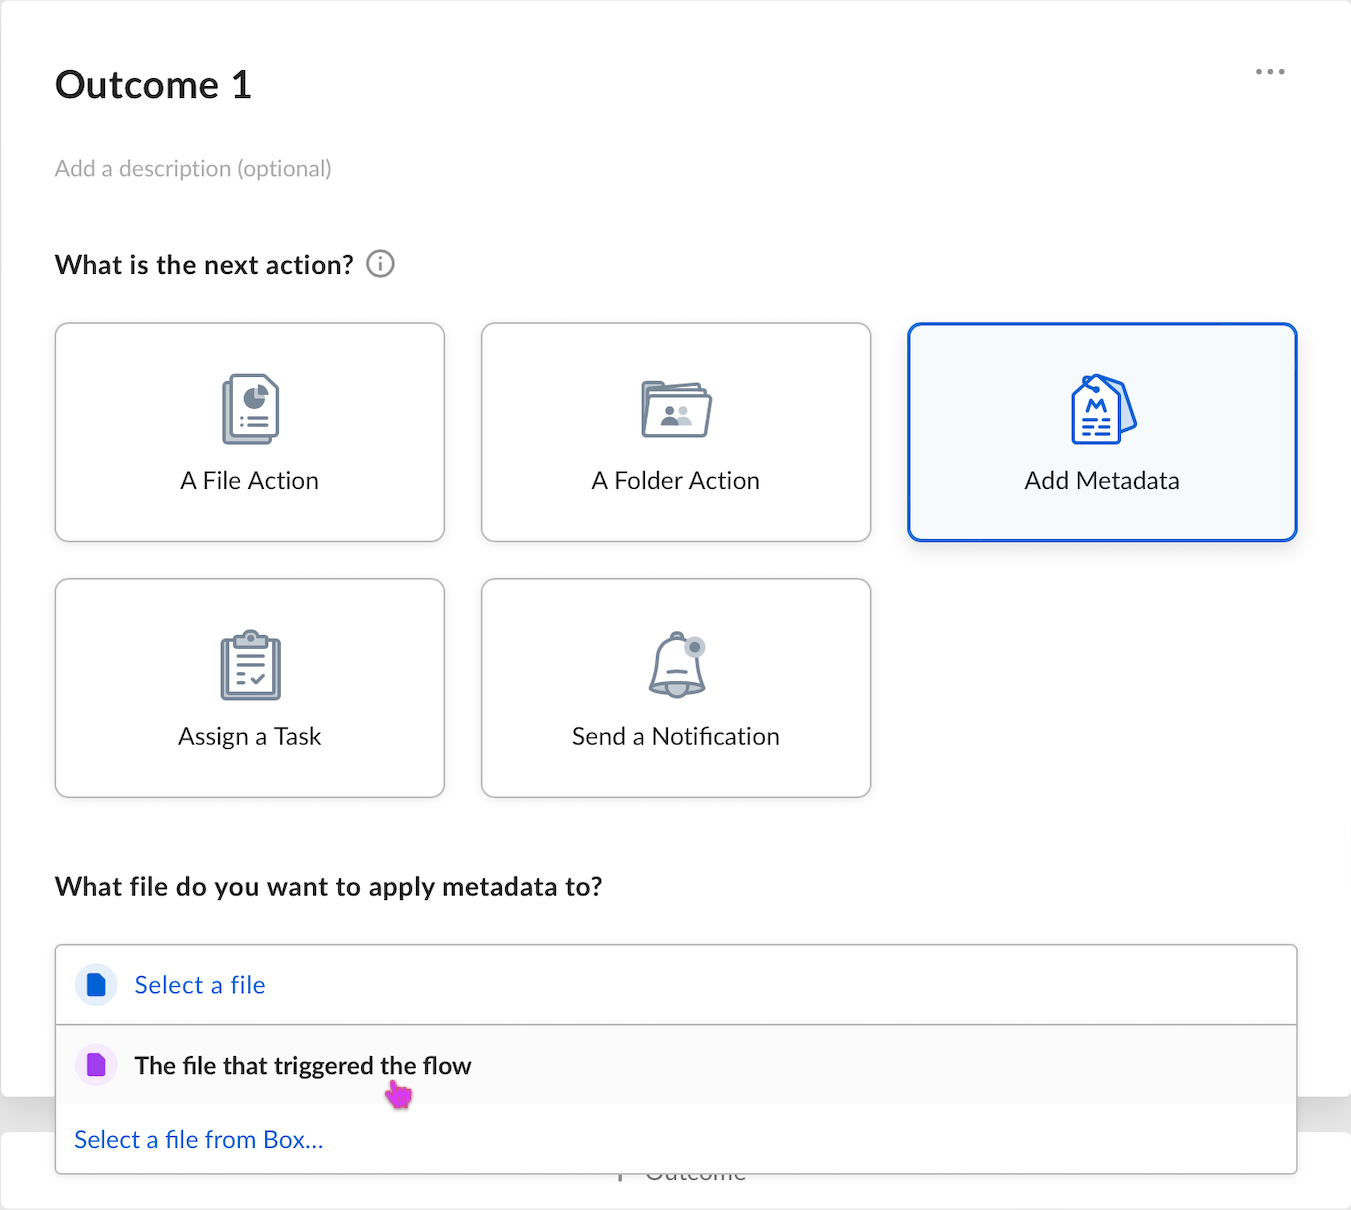
Click the Select a file box, then click The file that triggered the flow.
-
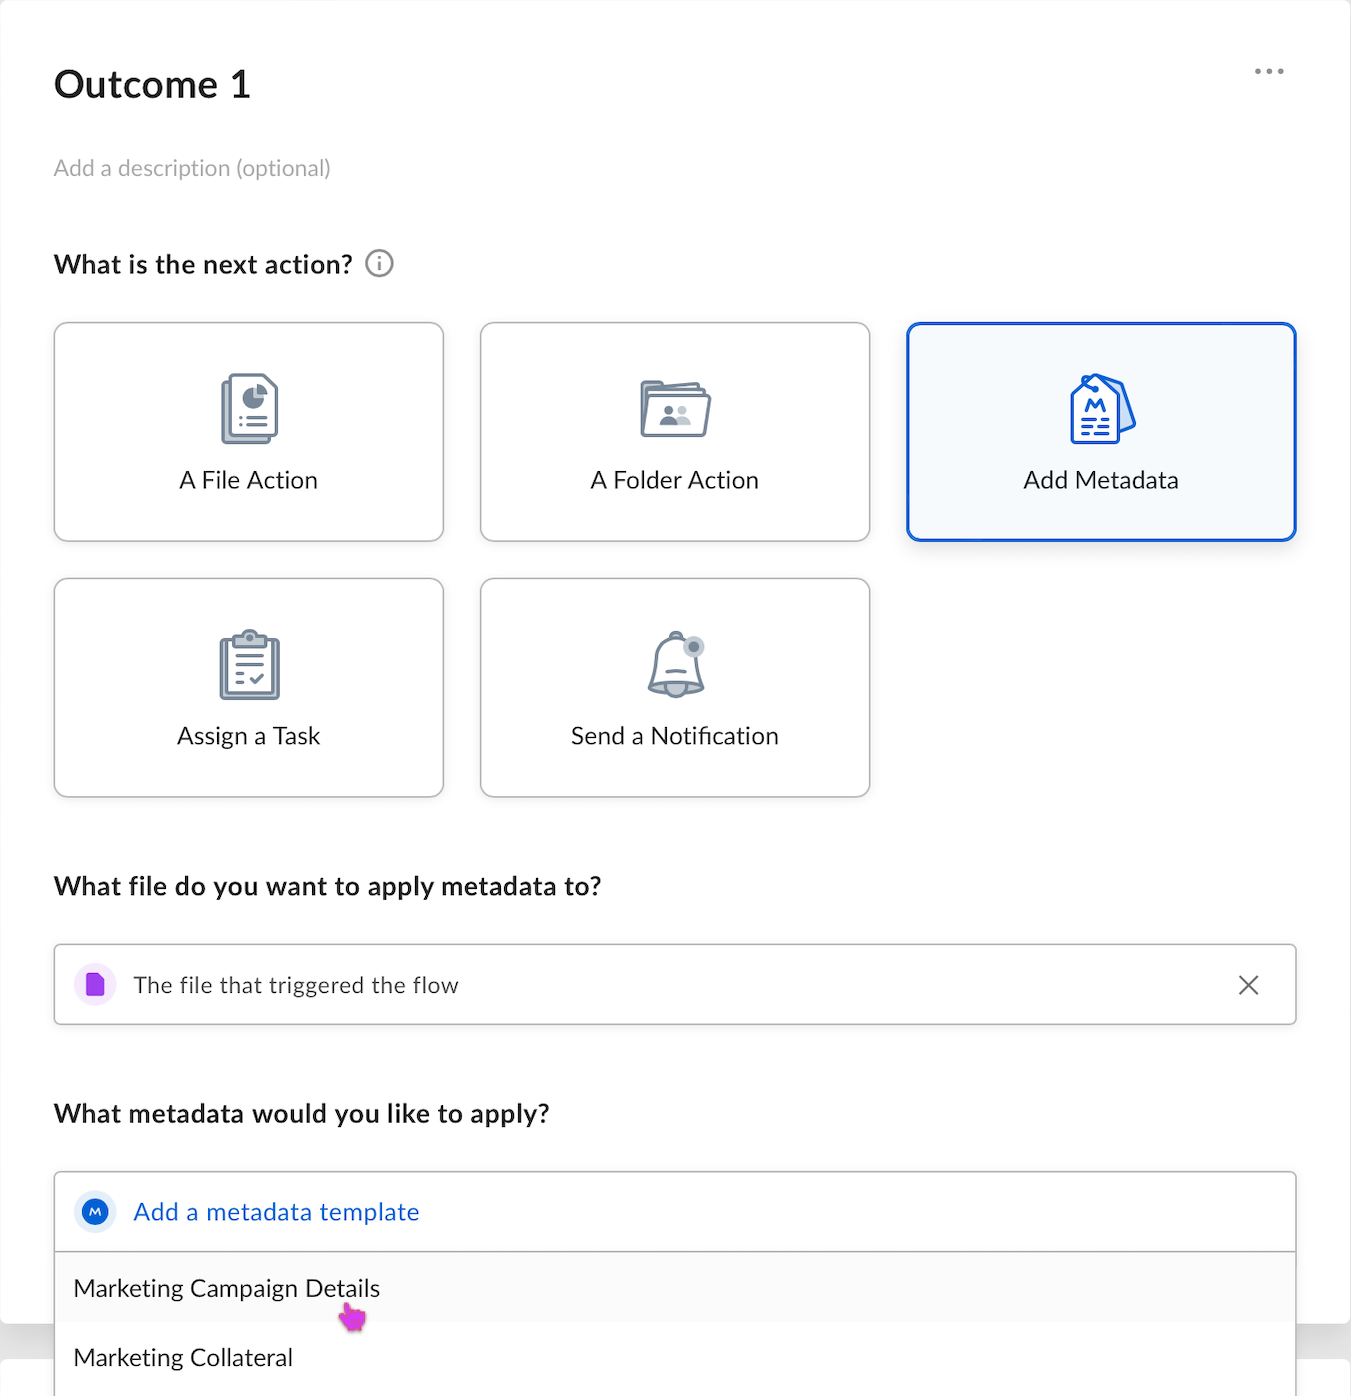
Under What metadata template would you like to apply? click the box to display your list of metadata templates. Then click the template you want — in this case, the Marketing Campaign Details template.
-
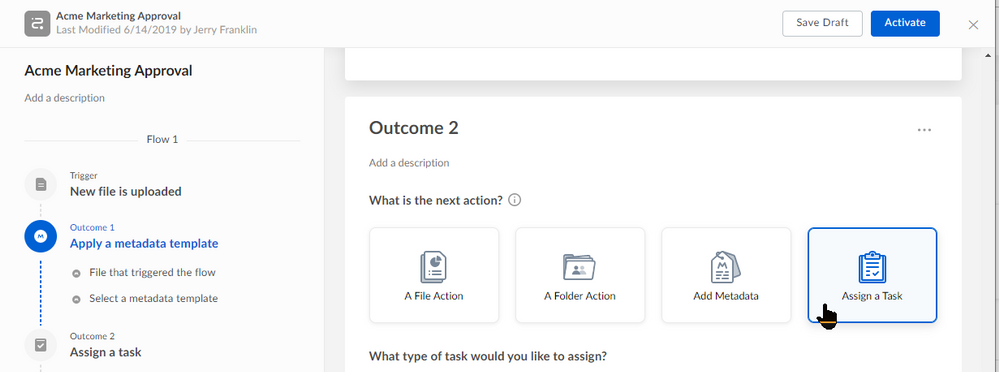
Click + Outcome. The Outcome 2 box displays.
- Adding outcomes is how you can string together a long chain of events in a complex workflow.
-
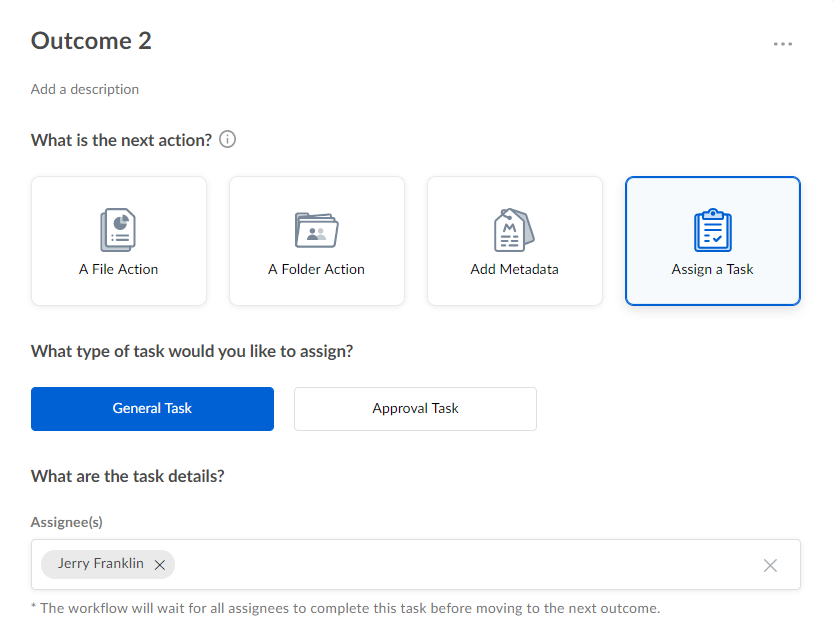
Click Assign a Task.
- Under What type of task would you like to assign? click General Task.
-
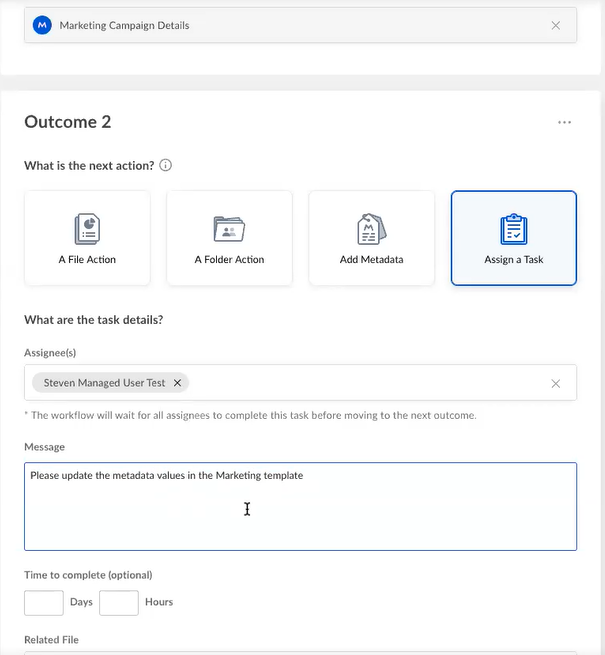
Under What are the task details? click the Assignee(s) box and begin typing in the name of the assignee you want. When their name displays, click the name.
-
In the Message box, type in clear instructions for the assignee – in this case, to update the metadata values in the marketing template.
-
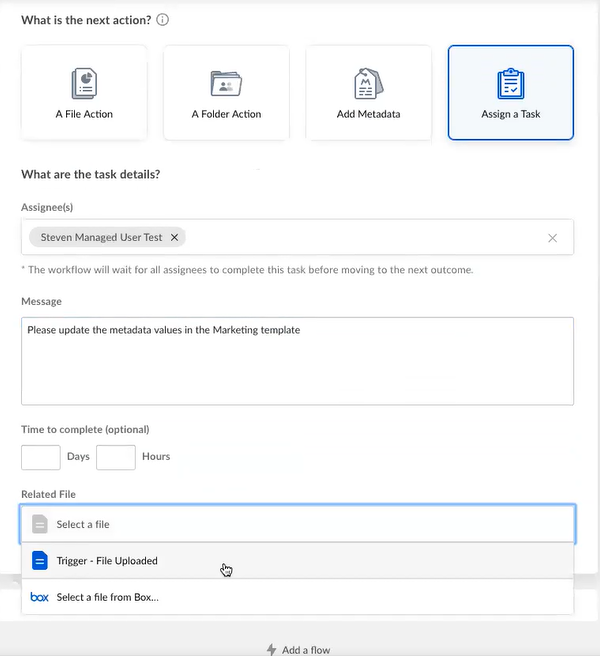
Under Assign the task to a file, click the box and then click The file that triggered the flow.
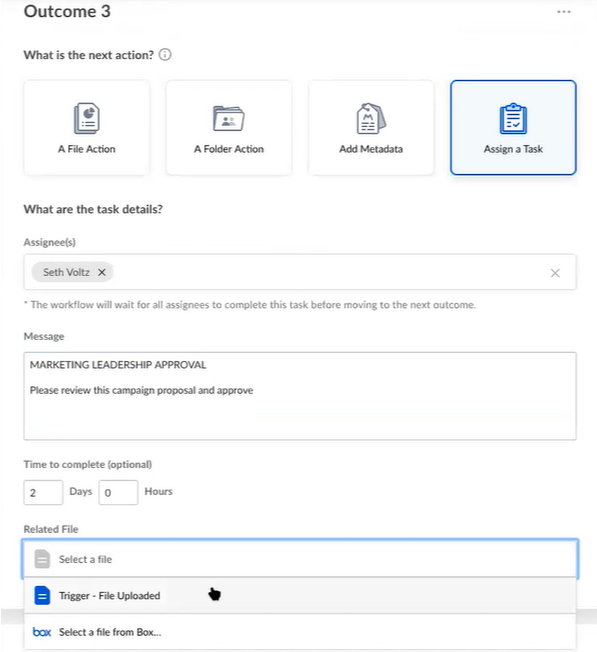
- Click + Outcome. The Outcome 3 box displays.
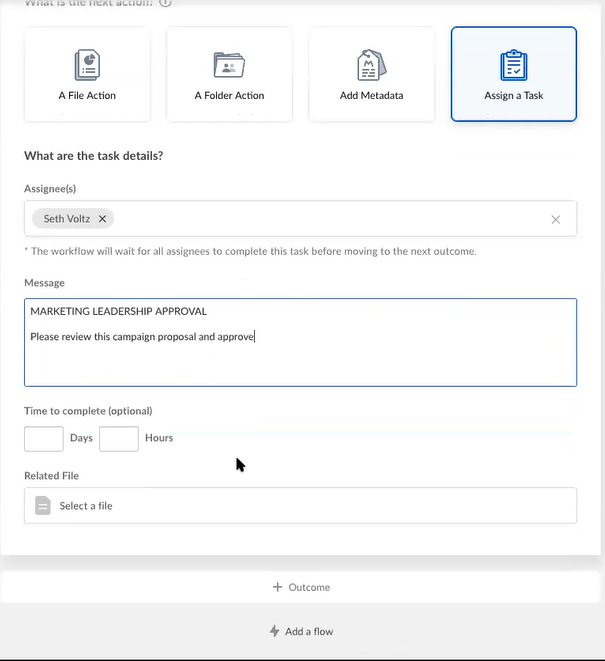
- Click Assign a Task.
- Under What type of task would you like to assign? click Approval Task.
- Under What are the task details? click the Assignee(s) box and begin typing in the name of the assignee you want. When their name displays, click the name.
-
In the Message box, type in clear instructions for the assignee – in this case, to review and approve the campaign proposal.
- Optionally, if this task is time-sensitive, provide a deadline. To do this, under Time to complete, type in the number of Days and/or the number of Hours. In this case, in the Days box, type 2 . In this case, if after two days the assignee has not approved this proposal, Relay changes the status of this workflow to Overdue, and notifies the assignee that the task is overdue.
-
Under Assign the task to a file, click the box and then click The file that triggered the flow.
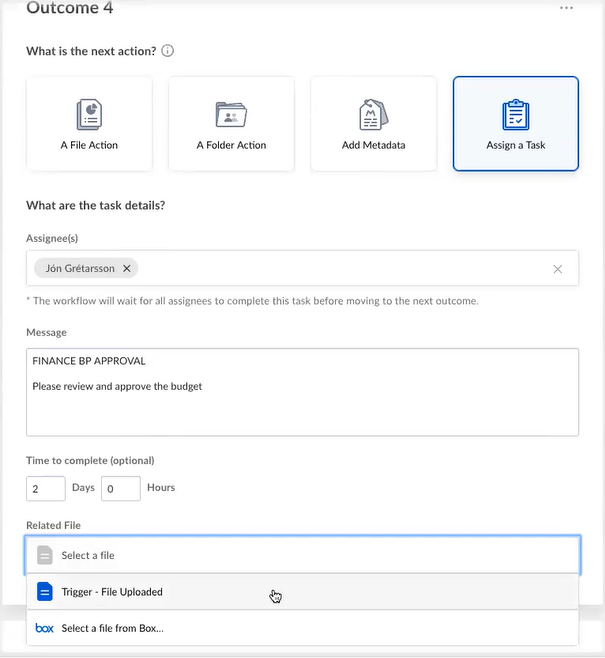
- Click + Outcome. The Outcome 4 box displays.
-
Click Assign Task > Approval Task, and as you’ve just done before, select an assignee, type in any relevant instructions and, optionally, a deadline, and identify the related file.
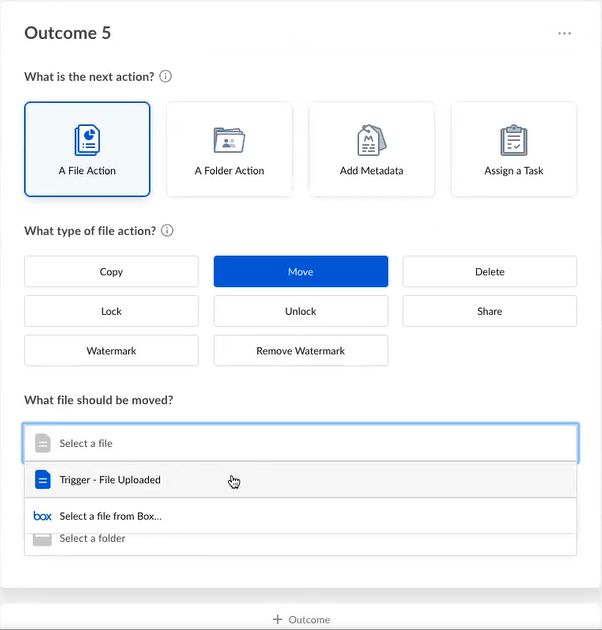
- Click + Outcome. The Outcome 5 box displays.
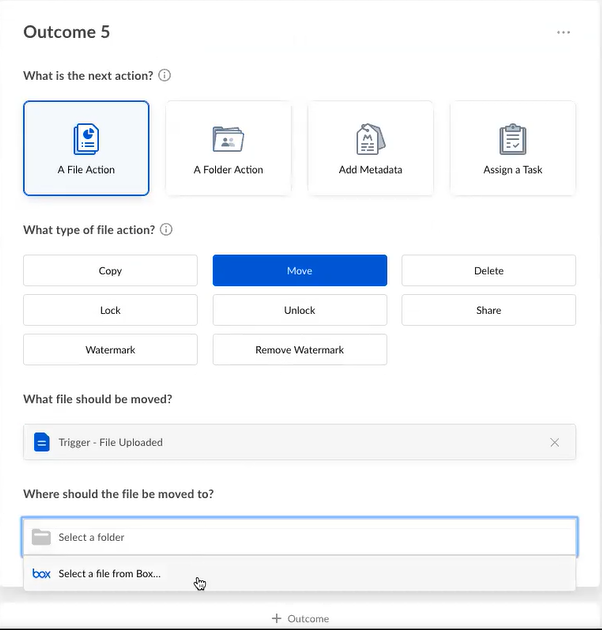
- Under What is the next action? click A File Action.
- Under What type of file action? click Move.
-
Under What file should be moved? click The file that triggered the flow.
-
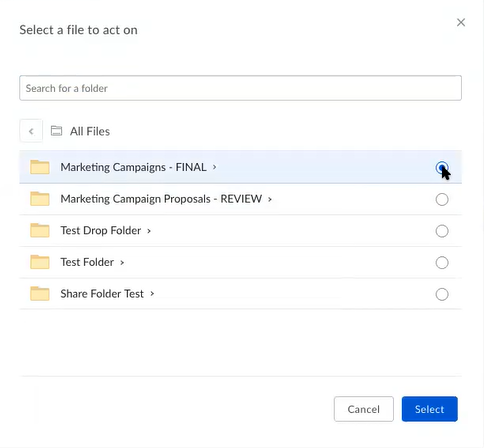
Under Where should the file be moved to? click the box, then click Select a file from Box.
- When the Select a folder to act on box displays, next to the folder you want, click the button and then click Select. You’ve just instructed Relay to upload the completely approved file to the Marketing Review folder.
- Save the workflow as a draft — OR —
- Activate it.
- Click Activate.
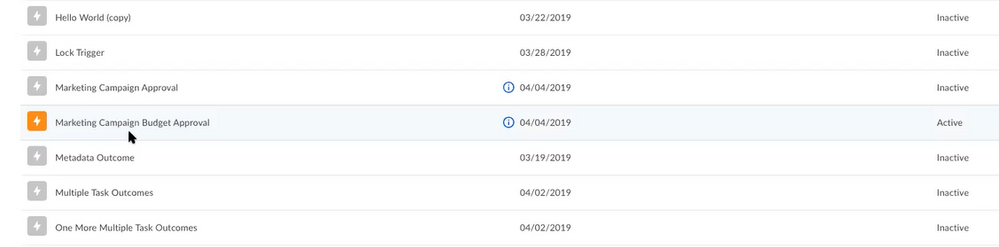
- Return to your Workflows page. The workflow you just created displays as orange (that is, active). Now the workflow runs each time someone drops a file into the designated folder.